When summer comes around, so do Bing cherries! Are you thinking what I am thinking? Salsa!! No? Well, you will after you try this Cherry Salsa.
This recipe was originally created by none other than Martha Stewart. She suggests putting it on tilapia but I also like it on chips and spoons.
What you will need:
2 cups of pitted cherries, chopped up (I cut it into fourths because I like it chunky)
1/2 of a red onion, diced
1 jalapeno, seeded and diced
About 3 tablespoons of cilantro (about 1/3 of the bunch you buy at the store)
lime juice (original recipe suggests 1 tablespoon but I use the whole lime)
Salt, pepper
Before you begin, go out and splurge on a cherry pitter. Seriously, you can remove the pits by yourself but your fingers will be stained cherry red for the rest of the summer. This might sound cool, but it is not.
Then cut up everything and mix it all in a large bowl. I like to make it the night before to let all of the ingredients really mix well together.
A few tips: To cut up the cilantro, grab the bunch and scrape your knife against the stem. The leaves will come right off for you. (Thanks to Ina Garten for this tip.)
Always handle jalapenos with baggies on your hands. Then you will not get jalapeno juice in your eyes.
Maybe I should go taste test this now? Enjoy!
Thursday, June 25, 2015
Wednesday, June 24, 2015
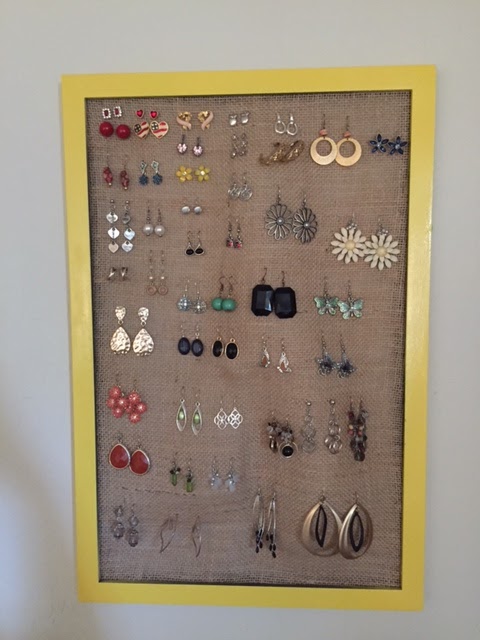
Burlap Earring Holder
Summertime, in the life of a teacher, means doing lots of home improvement projects that I never have time for during the school year. Thanks to Pinterest, my list is growing by the minute.
A few weeks ago, I saw an idea to make this earring holder. My earrings have spent their time in a jumbled mess in a drawer. I cannot tell you how many mornings I have found one earring only to never find the matching earring because it is lost in the abyss. There has to be a better way, right? Pinterest to the rescue! I found the original directions here: www.pinchyourpennies.com/diy-jewelry-holder.
Here is my final project:
Here is how I did this: First, I went to Goodwill and bought this frame. (Did you know people stand in line for Goodwill to open? Even in the heat of the summer. I had no idea.) I chose this frame because it was the right size that I was looking for and I thought I could easily remove the glass. And it was only $2.99.

On the way home, I also stopped at JoAnn's. I bought burlap, spray paint, and spray adhesive. Then I put everything on my kitchen table and let it all sit for a few weeks. Why rush things?
When I finally got the itch to get started, I removed the glass. It turned out to be two pieces. I should have saved them to make something else, but I threw them away. I also found a smaller frame inside that I could use to attach the burlap. I took it outside and sanded off most of the black. It came off easily.

Then I brushed it off so that there were no little pieces of grit or powder. Now for the fun part. I got out the spray paint.

I chose this brand because it said it adheres to everything and it did, kind of. I found it covered the top really well but it slid off of the sides. My knowledge of spray paint is not very good so I have no idea what kind I should have used. (If you have suggestions, I would love to hear it!) I ended up spraying on three coats and then let it sit over night. (After about an hour, I moved it to a new piece of newspaper so it would not stick to the frame.)

The next day, I glued on the burlap to the smaller inside frame. A huge word of advice: buy repositionable adhesive! I learned this the hard way. I glued my piece of burlap to the smaller frame and then placed it inside the larger frame using the screws on the frame to hold it in place. My burlap is VERY bulky and is much TOO big but, you know what, I finally finished this project and I'm just going to live with it.
Finally, I hung all of my earrings on the burlap. The only earrings that do not fit are my hoops. One thing I realized, after this was hung on the wall, is that I am going to have to take this down EVERY time I want to wear earrings. This might be a wall hanging that never hangs on the wall.
My earrings are now organized and I got a summer project done. Hooray for me!
Till next time!
Let's Try This Again!
Wow! It has been a few years since I posted here. I felt like I had nothing to share since I was not being creative every day. Now I realize that this blog does not have to be about scrapbooking or crafts only. I can share all of my likes (and dislikes) with you. So stay tuned for a new and improved Flutterby DesignsAZ!
Subscribe to:
Comments (Atom)